Table of contents
Open Table of contents
The Wordpress Blog
The original point of my Wordpress blog was for motivation to do some coding and research in my free time and then to write about it. However, after spending more time fighting with Wordpress than I would have liked but also being more busy than I wanted to be, I never really wanted to go back into the Wordpress + Hostinger editor to write more posts.
For anything you intend to do, if you make it as easy to start then you are more likely to do it…
So it became an at some point I will update my site.
Selecting a New Web Framework
Intermittently, I would watch videos from people on YouTube such as Fireship, often focusing on web frameworks. Around the time I was looking for an alternative to Wordpress, Astro released a new version and it caught my attention as it seemed to be pretty close to what I was looking for.
It is statically generated, posts are in Markdown and I can generally use templates to do most of the heavy lifting with respect to styling. In fact, long before I actually modified my website, I played around and coded through this Crash Course. With Astro it seemed really easy to get pretty much everything I wanted and more importantly adding posts is easy, too. So what would stop me from actually blogging ?
Hostinger
After playing with the framework, I didn’t really know what else I COULD do. I assumed that with my current hosting plan I would need an (additional) VPS and would have to configure the server and CNAME related settings myself and because I would effectively be paying to host a second server, it fell down my priority list of things to do. In fact, it even further removed any motivation to blog. Ultimately, it was someone at work who came across my website and asked me about it which caused me to look back into updating my blog. I decided why shouldn’t I just play with a VPS even if I don’t migrate my domain, because that’s too much hassle…
I started by trying to replicate what I saw in this video - buying a small VPS from Hostinger, trying to mimic the folder structure and pointing the relevant records to where they needed to go. It didn’t work, or I didn’t follow the instructions as I needed to… In the end, this was a blessing in disguise but I couldn’t get over the fact that it SHOULD be easier than this to host an Astro site. So by digging in a little bit further, I realised I didn’t need a second VPS, could refund the redundant one I had bought and host it actually very easily with my original hosting plan.
Hosting a Static Webpage on Hostinger
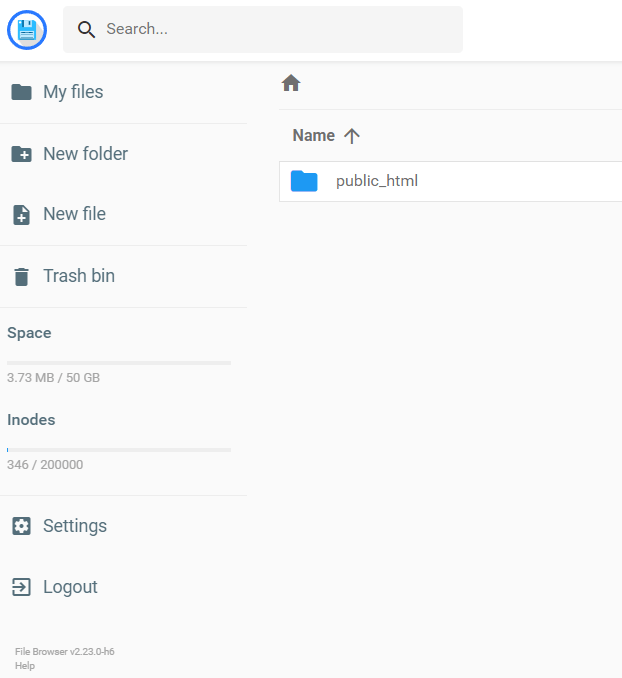
After some more directed googling (and some unhelpful Hostinger blog posts), I came across this video. When I noticed that the uploaded site wasn’t Wordpress, I connected the dots that the upload tool/file browser can be used for ANY static site files as long as they go into the correct folder. See below, this process basically entails deleting my Wordpress site out of the public_html folder and then uploading the content from my Astro build folder.
Automating Updating the Webpage on Hostinger
Of course it’s not great to log into Hostinger, delete the currently hosted pages and then re-upload a zip. Instead there was another tab that caught my eye, Git:
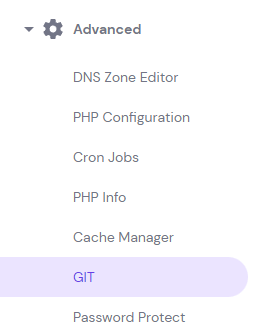
I knew that other ways of hosting Astro websites hook into Git services. When a designated branch is updated, it builds and publishes the new site to a publically accessible location. Github pages is one way to do this. However, we can hook into a repository and then update our Hostinger filebrowser in much the same way. Again, there is a great video that gets you most of the way - this basically requires setting up and adding a key to your Github project, then adding a webhook link which can be generated from the UI/Auto Deployment button.

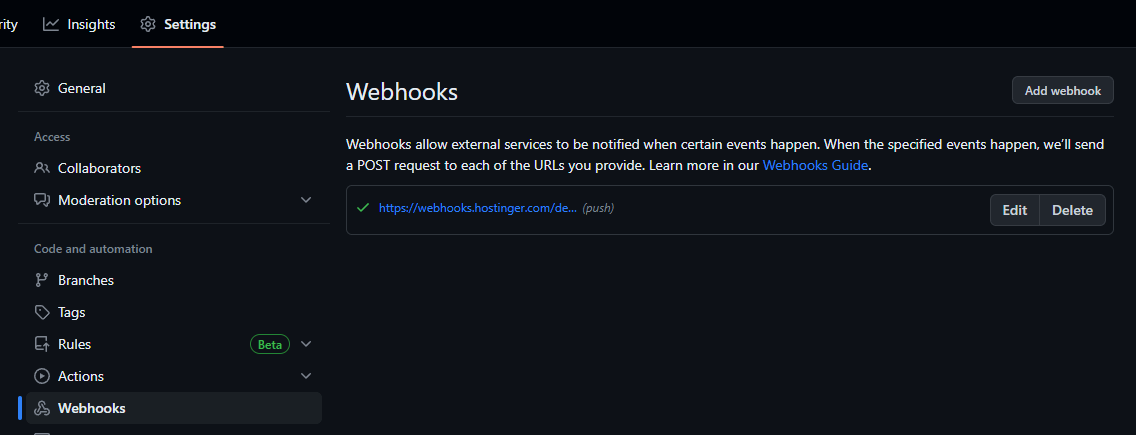
Therefore, the final challenge is uploading just the dist folder contents to Github, as these are the files required to be moved/deployed. Having looked into different Git strategies with regards to having one repository inside another, nesting repositories seemed a bit to involved for what I needed. Instead, I opted for an external build folder that would have its own separate Git repository which I could remotely push to Github.
├───blog
│   └───tim-watson
│       ├───.astro
│       ├───.husky
│       ├───.jampack
│       ├───dist
|       ...
├───blog_dist
│   ├───about
│   ├───assets
│   ├───images
│   │   ├───about
│   │   └───pihole
│   ├───posts
│   │   ├───1
│   │   └───creating-a-pi-hole-instance-with-ansible-and-docker
│   ├───search
│   ├───tags
│   │   ├───ansible
│   │   ├───automation
│   │   ├───docker
│   │   └───pi-hole
│   ├───tim-watson-dist
│   └───_astro
My project structure is illustrated above - blog and blog_dist. Inside blog are my project files for the website tim-watson. You may notice that inside blog there is also a dist folder. My solution to creating an outer build folder was to modify the package.json build command and copy the files, but not remove the dist folder.
"start": "astro dev",
"build": "astro build && robocopy .\\dist\\ ..\\..\\blog_dist /E",
"preview": "astro preview",
The build command took a bit of tinkering to get exactly right. First, we build our website into the local dist folder inside the main project. We then need to recursively copy everything to our outer folder (blog_dist) which we can then push to Github. Unlike with Linux (cp), this seemed to be far more finicky on Windows but fortunately we can use ROBOCOPY with an \E argument to both copy but also leave the contents in the main project folder.
-------------------------------------------------------------------------------
   ROBOCOPY     ::     Robust File Copy for Windows
-------------------------------------------------------------------------------

  Started : 13 July 2023 20:50:24
              Usage :: ROBOCOPY source destination [file [file]...] [options]

             source :: Source Directory (drive:\path or \\server\share\path).
        destination :: Destination Dir  (drive:\path or \\server\share\path).
               file :: File(s) to copy  (names/wildcards: default is "*.*").

::
:: Copy options :
::
              /E :: copy subdirectories, including Empty ones.
              /MOVE :: MOVE files AND dirs (delete from source after copying).
The reason I leave out the /MOVE argument is so that the dist folder remains in our project folder. This allows for the preview command in our package.json to work, i.e. we can see the website that was built (sometimes they don’t look exactly the same as when running the dev command).
Selecting A Blog Template
This section is slightly out of order to how I created my Astro webpage. I had already created my blog, before I uploaded it to Hostinger. However, for those interested in the styling and the customisations to the template I chose, I will list a few. But I am by no means a front-end developer and I definitely don’t enjoy it!
On the Astro website there is a showcase page for themes to get your site started. I scrolled around until I settled on trying Astro Paper (or here on the showcase page). This theme had pretty much everything I was looking for: simplicity, blog posts, built in light/dark mode with styling and fonts that I quite liked.
My main modifications to this theme where widening the main column in the centre (and then matching the header and footer to these size changes). For example, this snippet from PostDetails.astro widens the size of the post size, specifically the max-w-#xl.
<style > main {
  @apply mx-auto w-full max-w-7xl px-4 pb-12;
}
This pattern is repeated throughout the header file (Header.astro). Below is an example for the navigation bar:
.nav-container {
  @apply mx-auto flex max-w-7xl flex-col items-center justify-between sm:flex-row;
}
The line underneath the nav bar is an imported prop from Hr.astro. This prop object has been resized to fit with the other modifications.
---
export interface Props {
  noPadding?: boolean;
  ariaHidden?: boolean;
}

const { noPadding = false, ariaHidden = true } = Astro.props;
---

<div class={`max-w-7xl mx-auto ${noPadding ? "px-0" : "px-4"}`}>
  <hr class="border-skin-line" aria-hidden={ariaHidden} />
</div>
Most of these changes were quite fiddly like finding which elements affect different parts of the blog and give it the ability to expand, as well as re-ordering the header, changing the number of posts or changing the name of the site and aligning this correctly.
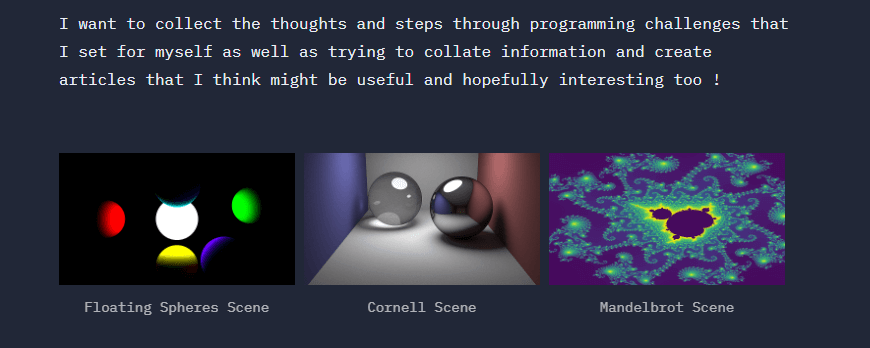
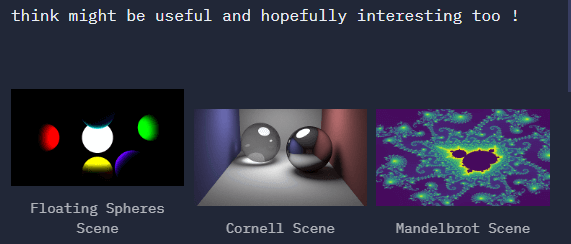
The other final challenge was migrating my previous two pages from Wordpress to Markdown. For the most part this was pretty easy and quite painless, which was the entire point of choosing a static webpage that uses Markdown. However, images proved to be quite challenging, especially lining them up correctly and more specifically getting the three images in my about page to display inline with captions. Eventually, I found the cleanest way (I hope) below:
<figure style="width:32%">
  <img
    src="/images/about/480k_6spheres_Z-min.png"
    alt="Floating Spheres Scene"
    title="Floating Spheres Scene"
  />
  <figcaption>
    Floating Spheres Scene
  </figcaption>
</figure  >
<figure style="width:32%">
  <img
    src="/images/about/480k_400sp_20L-min.png"
    alt="Cornell Scene"
    title="Cornell Scene"
  />
  <figcaption>
    Cornell Scene
  </figcaption>
</figure>
<figure  style="width:32%">
  <img
    src="/images/about/480-0000000240-min.png"
    alt="Mandelbrot Scene"
    title="Mandelbrot Scene"
  />
  <figcaption>
    Mandelbrot Scene
  </figcaption>
</figure>


<style>


figure, figcaption {
  align: left;
  display: inline-block;
  text-align:center;
}
But I did go through several iterations. On the page you can still see old versions commented out, see below:
<!-- for some reason the images dont display equally so i hack the width of them ... unsure why this is :(
<img src="../src/images/about/480k_6spheres_Z-min.png" alt="Floating Spheres Scene" title="Floating Spheres Scene" width="97%">  |  <img src="../src/images/about/480k_400sp_20L-min.png" alt="Cornell Scene" title="Cornell Scene" > |<img src="../src/images/about/480-0000000240-min.png" alt="Mandelbrot Scene" title="Mandelbrot Scene" width="94%">
:-------------------------:|:-------------------------:|:-------------------------:
 Floating Spheres Scene |  Cornell Scene | Mandelbrot Scene

td, th , table{
  border: hidden !important;
  padding-bottom: 0px;
}

deprecated now using figures
-->
The new version allows for much better padding between captions and the images are actually the same size which is great, too. Unfortunately, when you view this on a small screen or mobile, they don’t seem to resize equally. So there is still more work to be done here, for example a min-width field in the style sheet may resolve this issue. Though I think there also need to be some modification to how the images display inline.
Finally, the circular image at the top of the page has transparency which worked fine while running a development build of the website. However, when building with Astro Paper’s default build command, resizing the image this way caused issues. Attempting to modify the image size resulted either in loss of image quality or loss of the transparency layer, so I decided to leave it for now.
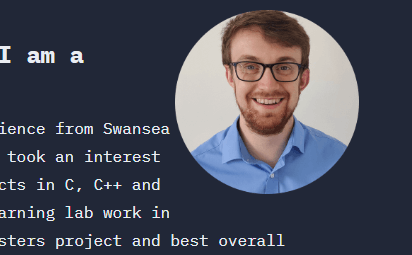
<img
  align="right"
  src="/images/about/Tim_website_circle.png"
  alt="Tim Watson Picture Circle"
  title="Me"
  width="25%"
/>
The issue is caused by jampack and I wasn’t able to find any decent documentation about it. Other issues also occurred with finding the location of images during the build process, so it seemed easier to just remove jampack from the build stage.
"build": "astro build && jampack ./dist",From this point onwards the website was mostly styled as I wanted it to be - primarily widended. So with all the old pages copied over, it was pretty much ready to upload to Hostinger and start blogging…
